
Being a professional security and monitoring expert for over 12 years, we’ve seen a lot of homeowners 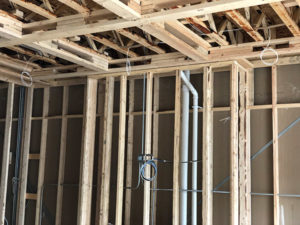 caught in troublesome situations due to improper pre-wiring by a contractor or themselves. The potential drawbacks are vast. These suggestions will aid you in making sure the correct wires are run in the proper areas. Ideally, these suggestions will help you save money and time, leaving you with an optimized outcome. These recommendations are based on experiences we’ve had and offered solutions for a better experience. Feel free to share your own suggestions by leaving a comment in this article’s dedicated forum thread.
Exposed wiring should be covered up.
Although you might be gentle with your expensive 50’ HDMI cable, not everyone performing work on your property will treat it as if it were their own. Once your whole home has been wired, use plastic bags to cover up any exposed wiring. The bags should be wrapped with electrical tape to make sure that they don’t come off. If the exposed cables aren’t secured, they might be painted over and textured with the rest of the house. Make sure that the cables are tied up in a manner that gives the contractors access to the drywall (so that they can cut holes in the walls where necessary).
Having your exposed wiring covered up protects it when renovation work is being carried out in your home.
Make Pre-Wired Your Priority
After all, pre-wired homes provide safety, convenience and technological advantages that also can bring great resale value if you ever plan on moving. As the prewiring experts, Chicago Security Expert will have your home set for the future with efficient systems for alarms, monitoring, sound, home theater and more. If yours is new construction, work with us to have your new home prepped and ready to serve you before any of the drywall is installed.


Speaker wires with 4 conductors should be utilized.
If a speaker system is being wired for the entire house, money and time can be saved by using a 4-conductor speaker wire. The majority of speaker wires are labeled as 2-conductor – in other words, there are a pair of individual wires, which is sufficient for one speaker. There are a quartet of individual wires in 4-conductor wires, allowing you to connect a couple of speakers. When a 4-conductor is used, one speaker cable is all that needs to be pulled for every room with two speakers.
You may find 4-conductor wires listed as “conductor/gauge count” when you’re looking for one. For instance, a 4-conductor/16 gauge wire will be labeled as 16/4 (generally referred to as “sixteen four.” 14/2 is the label for a 2-conductor/14 gauge wire.


When a home in in the process of being wired, those wires should be labeled.
Your wires should always be labeled. It’s prudent for them to be labelled far along the jacket to prevent the label from being cut off when the wire is stripped.
When wires are run for speaker systems in the entire home, I encourage wiring them for volume control use. This process involves having the wire slightly looped within the wall, where you expect the volume control to be. The wire may be drywalled, and the volume control may never be used. However, if you change your mind about volume control installation down the road, the drywall can be cut, giving you access to the wire.
Prepare for wireless PoE points of access.
As the abilities and amounts of devices connected online keep going up, the demands of private wireless networks go up with it. For a lot of families, one router is not strong enough for the pressure modern technology places on a network. As such, we suggest preparing for a wireless network you can manage, or several wireless access points, if feasible.
Ethernet alone can be used to power many commercial WAPs (wireless access points). This is called power over ethernet (aka PoE). By running several ethernet cables to multiple locations in the household, you are prepared for a wireless range expansion courtesy of PoE WAPs. Modern houses likely already have ethernet wiring, however, they tend to run to the same area as AV equipment or cable jacks. This is not an ideal space for a WAP.
Our households have CAT6 cables that are concealed behind black wall plates inside the hallway closet, kitchen pantry, and master bedroom ceilings. This lets us effortlessly add more WAPs in centralized areas. They are unseen and don’t interfere with other electronics. If this hasn’t been done in your home, there are alternative methods of enhancing your wireless network’s range.
Utilize low voltage electrical boxes.
Use low voltage boxes.
For outlets and light switches, high voltage boxes are ideal. For volume control installation or running HDMI cables, high voltage boxes are discouraged. When feasible, low voltage boxes should be used, which are as big as their counterparts. Low voltage boxes aren’t enclosed and are easier to work with. AV wall plates won’t be effective in conjunction with high voltages boxes, in some cases.
Sometimes, low voltage boxes come with loops that zip wires can be tied to.
HDMI is not something to depend on.
With regards to connecting modern home theatre equipment, HDMI is the standard. What do you do when an HDMI cable that is pre-wired isn’t effective, though? Perhaps a drywall screw penetrated it? What are your options when the specifications for HDMI are altered, and the cable embedded in your wall doesn’t function as it used to? In these types of scenarios, it is prudent to run a pair of CAT6 cables in addition to an HDMI cable. The CAT6 cables serve as a backup. While using an HDMI balun, one or two CAT6 cables can act as a substitute for an HDMI cable.


Chronicle the final product.
Refrain from memorizing the wiring diagram, particularly when large products are involved. Although you likely won’t require a wiring diagram, you should document where certain wires are run.
We regularly take pictures of wires that are concealed in the wall. Further, we use our mobile devices to shoot footage of each pre-wire we install. In the footage, we go over the intent and thought the process of every wire. If you aren’t able to shoot video, make notes on the wall directly and take a picture of what you have written. As you can see in the following image, we wanted to find the precise location of a couple of wall studs and where certain wires ran. Having a picture taken with the tape measure in it helped me find both the studs and the wire once the home was completed.
Measure wiring inside a wall
There are a trio of approaches to use when wiring a house for in-ceiling or in-wall speakers. Wire can be looped in the ceiling/wall and yanked out when holes are cut for speakers. This tactic works efficiently when you’re unsure about the exact location of where the speakers will be. This is practical when you’re not committed to the installation of speakers since the wire will be concealed, unable to be seen.
Another approach is to buy new construction brackets (aka rough-in brackets) and have them installed. Before drywall is applied, installation of these brackets begins. Once the drywall is hung, the contractors will cut around the brackets. There are a number of benefits to using this tactic. For instance, you can have your speakers inserted with precision during construction, and have speaker back boxes installed to minimize the transfer of sound to other rooms. This process will also enhance quality of sound, and best of all, the speaker installation doesn’t warrant any drywall cutting. A drawback to this approach is that you need to know precisely where the speakers will be placed prior to the completion of construction. Another downside is that the brackets will need to be paid for, which can set you back $20 to $40 per pair.
On the right of this picture, you can see the new construction brackets prior to their assembly and installation. You can also see an RBH Sound Foam Back Box in the picture, which can be installed after drywall is applied. Not very many back boxes there can be installed once construction of a home is complete.
There is a third approach that is a hybrid of the initial two. Rather than purchasing new construction brackets, cardboard can be stapled between the studs, and the speaker wire can be poked through the cardboard. If you are fortunate, the drywall contractors will cut around the wire. If you opt to move the speaker a little, spackle can be used to patch the hole effortlessly. If you’re unfortunate, the drywall contractors will not cut a hole, and as such, the wire will be totally hidden within the wall.
A conduit can be run up outer walls.
Once your home is complete, you will still have the ability to have new wires run by getting them strung through the attic. Assuming the wire is run to an area on an inner wall, this endeavor should be hassle-free. With that said, having a wire run down an outer wall can be challenging. Because outer walls are insulated, you will require a fiberglass rod or similar wire fishing equipment. Further, you will have to deal with a lack of space between the roof and the top of the wall. This might warrant crawling to the outer wall and using several drill bit lengths or an angle drill.
If you don’t plan to run conduit throughout the household, you should have holes pre-drilled in some outer walls’ top plates, at the very least. Approximately 5 feet of conduit should be run down the wall with 5 feet remaining in the attic. In turn, you’ll be able to add wires later, if desired. This is not an approach I employ very often, but it is a tidy, fast, and simple method of running some conduit in your household.
Wire for more than one subwoofer area.
It is our belief that the subwoofer is a surround sound system’s most important speaker. It also happens to be the most troublesome speaker to have placed in a room correctly. The location of the subwoofer has a substantial impact on quality of sound. Therefore, you should endeavor to wire for more than one location. This will let you assess the performance of the subwoofer in numerous areas around the room before choosing the best spot(s) — the result: high-quality base in the area of your choosing.
Wiring for more than one location will let you use several subwoofers. A single subwoofer isn’t capable of offering optimal sound across many seats, but having another subwoofer added can make a huge difference in the way sound is heard, particularly when it comes to bass.
Have a pull string run after utilizing a sizeable conduit.
Conduit running is worthwhile. It allows you to future-proof your system as best you can, assuming you’re using the right conduit.
More than five years ago, I had a meeting with a client who wanted a television mounted over a patio door. He was constructing an all-season porch that featured glass ceilings and walls. I encouraged the client to run HDMI as well as have a conduit run up the television from the equipment area. About 90 days later, I returned to install the AV gear and saw a lack of HDMI running. The electrician ran the conduit only, so I had to make the HDMI run through the conduit. Normally this would not be a problem, but in this case, the conduit had a diameter of only ¾ inches. A coax cable wouldn’t fit through it. I ended up fishing one CAT6 cable through, and the client ended up paying an extra $700 for an HDMI balun (which aren’t as expensive as they used to be these days).
To bypass this kind of scenario, make sure that conduits from a display to equipment has a diameter of 1.5 inches (aim for 2 inches for optimal versatility). I suggest using Carlon Flexible Raceway as it comes in several different diameters, is adaptable for simple installation, has curved corners, and is supports many accessories. Carlon manufactures couplers to hook up a pair of conduits together, as well as clamps to keep the conduit in one place. They even produce couplers that keep the conduit secured to a low voltage workbox.
It isn’t necessary to run a pull line or pull string through the conduit during the installation process, but it won’t hurt. For $10 or so, you can buy a 500-foot spool. A plastic bag can be tied to the string’s end, and a vacuum can be used to yank it through the conduit. This is more effective than using fiberglass or steel fish tape.
In closing.
The suggestions you read here are some of our favorites with regards to pre-wiring a house. If you want more details about pre-wiring a house, have a look at the following links. Preparing your home theater for proper wiring is important for optimal functionality and performance. If you are curious about the suggestions in this article or have some ideas of your own, share them in this article’s dedicated forum thread.

Advantages of hard-wired security systems
Hard-wired security equipment is usually less expensive than wireless equipment. No batteries also means lower maintenance and added savings as well

Advantages of wireless security systems
Wireless systems tend to meet the requirements of modern technologies and offer certain expected conveniences